Introduction
Discovering Satopanth Lake
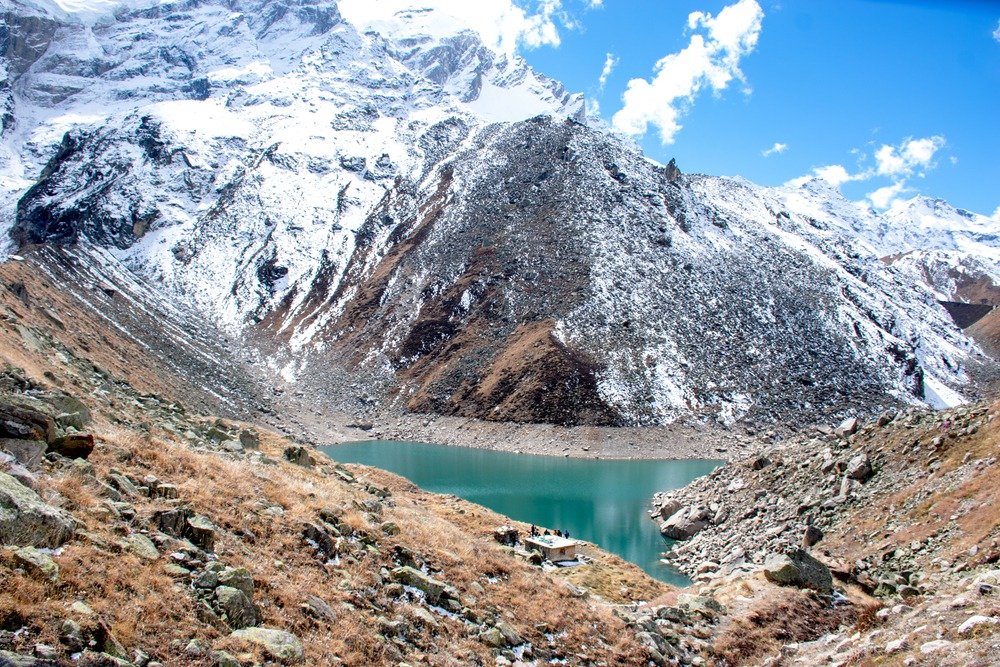
When I first stumbled upon images of Satopanth Lake Trek, I was captivated. This breathtaking lake is tucked away high in the Garhwal Himalayas, rising to a height of 4,600 meters (15,091 feet) and encircled by towering peaks. The striking turquoise waters, set against a backdrop of snow-capped mountains, looked like a scene straight out of a dream. Beyond its visual beauty, Satopanth Lake is steeped in mythology. It is believed that the lake is the meeting point of three gods—Vishnu, Shiva, and Brahma—which adds a spiritual significance to this trek. Knowing that I would be walking in the footsteps of legends made me even more eager to explore this sacred site.
The journey to Satopanth Lake Trek isn’t just a physical challenge; it’s an opportunity to immerse myself in the rich cultural tapestry of the region. From vibrant local traditions to the warm hospitality of fellow trekkers and locals, every step of the trek would be filled with stories waiting to unfold. I knew that this adventure would be as much about connecting with nature as it would be about discovering the essence of the Himalayas.
Why Choose Solo Trekking?
Trekking alone is about the inside journey, not just the destination. I’ve found that solitude in nature fosters self-reflection and a profound connection with the environment. The mountains have a way of stripping away the noise of everyday life, leaving space for clarity and contemplation. As I prepared for this trek, I anticipated moments of introspection—those quiet times when the only sounds are the rustling leaves and my own breath. It’s in these moments that I often discover new aspects of myself.
Moreover, trekking alone means I can set my own pace, stop to admire breathtaking views, and truly immerse myself in the moment. No need to compromise on timing; if I wanted to linger at a viewpoint or take a spontaneous detour, I could. This freedom added an extra layer of excitement to my planning. It was clear that this trek would be a unique opportunity for self-discovery, and I was ready for the challenge ahead.
Preparing for the Trek
Understanding the Terrain
The Geography and Climate

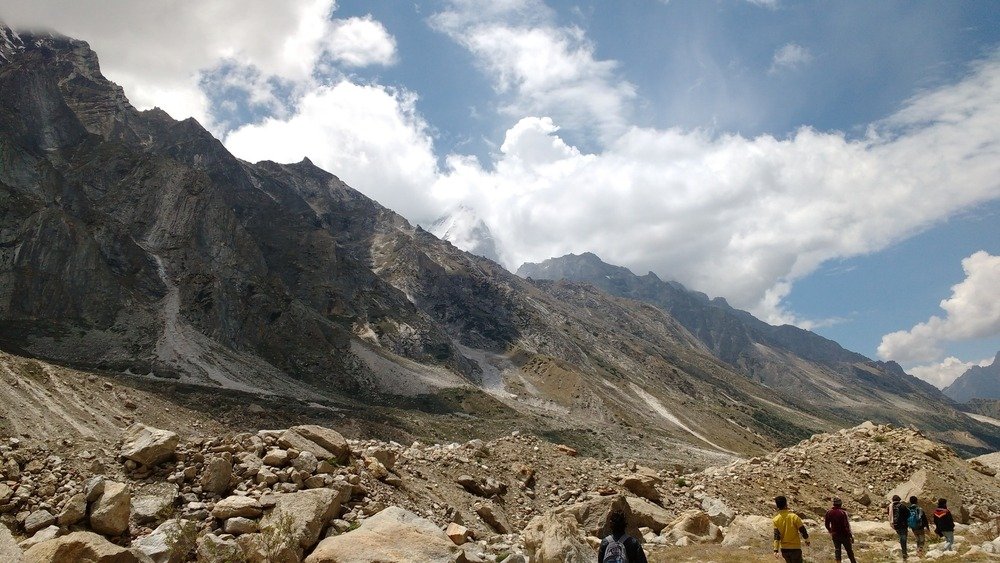
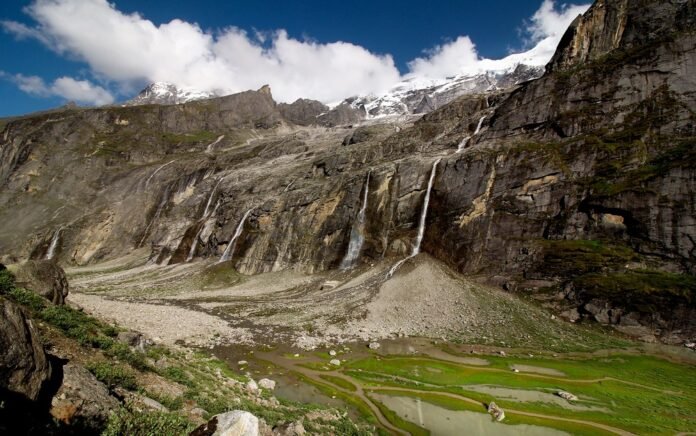
Before I hit the trail, I needed to grasp what I was up against. The route to Satopanth Lake Trek takes you through various terrains—from lush green meadows to rocky, glacial landscapes. Each stretch of the trek offers its own set of challenges and beauty. For instance, as I ascend, the vegetation thins, and the terrain becomes increasingly rugged. This variation keeps the journey interesting but requires me to stay alert and adaptable. Researching the geography not only helped me understand what to expect but also fueled my excitement for the breathtaking views ahead.
The weather can be unpredictable, with chilly nights and sunny days. I discovered that temperatures could drop significantly after sunset, so packing warm clothing was essential. While daytime temperatures might be pleasant, the nights in the Himalayas are no joke. I made it a priority to monitor weather patterns as my trek date approached, ensuring I was prepared for anything from sudden rain showers to clear, starry skies.
Key Challenges to Anticipate
The trek isn’t for the faint-hearted. Steep ascents and rocky paths can be tough, especially at high altitudes. The physical demands of the trek are significant, so I made it a point to familiarize myself with these challenges to better prepare mentally and physically. Knowing the route would include strenuous climbs helped me adjust my training regimen accordingly. I incorporated hill training into my workouts to simulate the conditions I would face, ensuring that I could handle the demands of the trek.
I also discovered that altitude sickness is a serious issue. As I planned, I took note of strategies to minimize risks—like pacing myself and staying well-hydrated. I researched symptoms and remedies, knowing that understanding what to expect would help me respond quickly if needed. This preparation made me feel more confident and ready to face the challenges head-on.
Choosing the Best Time to Trek
After doing some research, I found that the best time for the trek is between May to June and September to October. During these months, the weather is relatively stable, which means clearer views and a safer journey. I also discovered that trekking in the off-season could lead to unpredictable weather, with heavier rains and even snow in some areas. Marking my calendar was a must, and I planned my trip during the peak season to make the most of my experience.
Understanding the local climate was crucial as well. I learned that while the daytime temperatures might be manageable, evenings would require adequate warmth. This knowledge influenced my packing choices significantly. I would also see fewer crowds trekking during these months, making for a more tranquil experience. I could savor the tranquility of the mountains without the hustle and bustle of larger groups, enhancing my solo journey. I had a fantastic experience with The Searching Souls on my Satopanth Lake trek. Their team is knowledgeable and truly passionate about trekking!
Permits: A Must-Do
I quickly learned that I needed specific permits to trek through Nanda Devi National Park. It’s crucial to secure these in advance, so I contacted local trekking agencies to get all the paperwork sorted. Although the procedure was simple, it needed close attention to detail. I made sure to keep a copy of my permits with me throughout the trek, understanding the importance of having them readily accessible.
I looked up the park’s entry requirements in addition to the trekking permit. Knowing the rules not only kept me compliant but also gave me peace of mind. It’s essential to respect the local environment and the regulations in place to protect these stunning landscapes. Engaging with local trekking agencies also provided insights into responsible trekking practices, which I aimed to follow throughout my adventure.
Physical Preparation
Getting Fit for the Challenge
Trekking requires a certain level of fitness, and I was determined to be in top shape. I focused on building my endurance with cardiovascular workouts like running and cycling, complemented by strength training to tackle those steep inclines. I also made it a point to practice hiking on local trails—nothing beats training in similar conditions! Each practice hike was a mini-adventure, allowing me to fine-tune my gear and develop my hiking rhythm. I enjoyed exploring new trails, often dragging friends along to share in the excitement and motivation.
Moreover, mental preparation is just as important as physical training. I spent time visualizing the trek, imagining the challenges I would face and how I would overcome them. This mental rehearsal built my confidence and helped me anticipate any obstacles. By the time my trek date approached, I felt physically strong and mentally ready to embrace whatever lay ahead.
Essential Gear and Packing List
Dressing Right
Layering is key. I packed moisture-wicking base layers, warm insulating layers, and a durable outer shell to shield against wind and rain. A reliable pair of trekking boots and warm socks were non-negotiable. Comfort is everything when you’re miles away from civilization! I also included a lightweight down jacket for those chilly evenings, ensuring I’d stay warm without adding excessive weight to my pack.
I took my time selecting each item, considering factors like weight, durability, and functionality. After researching brands and reading reviews, I felt confident in my choices. Trying on my gear during training hikes was essential, allowing me to make adjustments and ensure everything fit well. This attention to detail gave me peace of mind that I’d be prepared for whatever conditions the trek would throw my way.
Camping Equipment Essentials
I opted for a lightweight tent, a high-quality sleeping bag rated for low temperatures, and a sturdy sleeping pad. With unpredictable weather in the mountains, having a reliable camping setup was essential. I researched various tent options, choosing one that was easy to set up and could withstand strong winds. The last thing I wanted was to struggle with my tent in inclement weather!
My sleeping system was also carefully chosen. I invested in a sleeping bag that provided warmth without being bulky. A good night’s sleep is crucial for recovery, especially after long trekking days. As I packed, I double-checked my gear to ensure I had everything I needed for a comfortable camping experience, including a good pillow substitute and extra sleeping layers.
Cooking Gear
Cooking on the trail is part of the fun! I packed a portable stove, lightweight pots, and utensils. I also opted for dehydrated meals—they’re easy to carry and prepare. While planning my menu, I ensured to include a mix of proteins, carbs, and some comfort foods. After all, a warm meal after a long day of trekking can feel like heaven!
I also packed snacks to keep my energy up throughout the day. Trail mix, energy bars, and fruit leather became staples in my pack. Preparing meals during my practice hikes gave me confidence in my cooking setup and reminded me of the joy of sharing food with friends—something I hoped to recreate on the trail, even if it was just with myself!
Safety Items
Safety can’t be overlooked. I made sure to pack a first aid kit, a map and compass (just in case), and a multi-tool. A whistle and headlamp were also on my list, just to cover all bases. I familiarized myself with how to use each item in my first aid kit, ensuring I’d be ready in case of minor injuries or emergencies.
I also invested time in learning basic navigation skills. While technology is great, I wanted to ensure I could find my way using traditional methods. This preparation gave me confidence in my ability to handle any unexpected situations. Knowing I had the right gear and skills made me feel more secure as I looked forward to my trek.
Planning My Itinerary
Trek Route Overview
Starting Point: Gangotri

I decided to begin my trek in Gangotri, a vibrant pilgrimage town buzzing with energy. The town, with its beautiful temples and welcoming atmosphere, was the perfect launchpad for my adventure. I planned to spend a day here, acclimatizing and soaking in the sights before hitting the trail.
During my time in Gangotri, I explored local trails and even met some fellow trekkers who shared their experiences and tips. This interaction added to my excitement and helped me gather last-minute insights about the trek ahead. The mix of spiritual energy and the promise of adventure filled the air, and I felt that I was exactly where I needed to be.
Daily Breakdown of My Trek
- Day 1: I would hike from Gangotri to Bhoj Kharak (approx. 8 km). The first day was about acclimatizing and getting into the rhythm of trekking.
- Day 2: The next day, I would make my way from Bhoj Kharak to Satopanth Lake Trek (approx. 12 km). I anticipated that this day would be the most challenging, but I was excited to see the lake.
- Day 3: A day to explore the magical surroundings of Satopanth Lake Trek. I planned to take it easy, soaking in the beauty and capturing photos.
- Day 4: I would start my journey back to Bhoj Kharak, taking my time to appreciate the route from a new perspective.
- Day 5: Finally, I would return to Gangotri, reflecting on my experiences and the memories made along the way.
This itinerary balanced challenge and leisure, ensuring that I had time to enjoy the journey. I also built in flexibility, knowing that the mountains could surprise me at any moment. I looked forward to embracing whatever came my way.
Accommodations on the Trail
While camping was my main plan, I discovered a few guesthouses in Gangotri. However, I was ready to embrace the simplicity of nature, so my tent became my home away from home. The idea of sleeping under a canopy of stars and listening to the sounds of nature was enchanting. I felt that camping would enhance my connection to the environment, providing an immersive experience.
I researched various camping spots along the route, noting safe places to set up my tent. Understanding the best locations for camping not only increased my comfort but also added an element of adventure to my journey. I relished the thought of finding the perfect spot with a view of the mountains, where I could enjoy my meals and reflect on my day.
Food and Water Sources
I meticulously planned my meals, focusing on nutrition and ease of preparation. I divided my food supplies into daily portions, ensuring I had a balanced diet. Along the trail, I identified potential water sources and packed a reliable purification system—nothing is more refreshing than cold mountain water! I researched the best practices for treating water, ensuring I had everything I needed to stay safe and hydrated.
Additionally, I planned for the possibility of running low on supplies. I noted the locations where I could refill my water and check for local food options if needed. This proactive approach ensured that I wouldn’t find myself in a bind, allowing me to focus on enjoying the trek without worrying about logistics.
Safety Considerations
Solo Trekking Tips
Trekking alone requires a bit of extra caution. I always informed someone about my plans, including my route and expected return. Staying connected with a mobile phone and power bank was essential for peace of mind. I also considered the possibility of encountering other trekkers along the way, knowing that shared experiences could lead to valuable connections and safety in numbers.
Furthermore, I researched solo trekking tips from experienced adventurers. I learned the importance of staying aware of my surroundings and trusting my instincts. If something didn’t feel right, I made a mental note to adjust my plans accordingly. This proactive mindset empowered me as I prepared for the trek.
Handling Altitude Sickness
Acclimatization is critical at high altitudes. I planned to ascend slowly, keeping hydrated and paying attention to my body’s signals. If I felt any symptoms, descending would be my first action. I researched foods and drinks that could help with acclimatization, incorporating them into my meals in the days leading up to my trek.
I also read about the experiences of other trekkers who faced altitude sickness. Their stories emphasized the importance of taking symptoms seriously and not pushing through discomfort. Knowing I had strategies in place to handle altitude sickness provided a sense of security, allowing me to focus on enjoying the trek rather than worrying about potential issues.
Emergency Contacts: A Safety Net
I compiled a list of emergency contacts, including local authorities and trekking agencies. Knowing where to seek help added a layer of security to my adventure. I made sure to have important phone numbers saved in my phone, along with printed copies in my backpack. This redundancy ensured I could reach out for help if needed.
Additionally, I researched the nearest medical facilities along my route. Understanding the location of these facilities provided peace of mind and helped me feel more prepared for any emergencies that might arise. This level of preparedness was crucial in my solo trekking journey, allowing me to embrace the adventure with confidence.
Conclusion
Planning a solo trek to Satopanth Lake Trek has been an exhilarating journey in itself. From the initial spark of inspiration to the careful preparation required, each step has brought me closer to my goal. With the right mindset and preparation, I was ready to embrace the challenges and joys that awaited me in the Himalayas. This trek isn’t just about reaching the lake; it’s about enjoying every step along the way, soaking in the beauty of nature, and discovering a bit more about myself.
Reflecting on my adventure, I realized that trekking solo allows for an unparalleled connection with the landscape and an opportunity for personal growth. As I stepped onto the path leading to Satopanth Lake Trek, I was not only a traveler but also an explorer of my own potential. I couldn’t wait to share my experiences and inspire others to embark on their own adventures.
FAQs
1. Is it safe to trek alone to Satopanth Lake Trek?
Absolutely! Many have successfully completed this trek solo. Just be well-prepared and follow safety guidelines. Informing someone of your plans and staying aware of your surroundings can enhance your safety significantly.
2. How difficult is the Satopanth Lake trek?
It’s moderately challenging. Proper training and acclimatization are essential to ensure a smooth experience. While some parts of the trek can be strenuous, the breathtaking views and rewarding sense of accomplishment make it all worthwhile.
3. What should I do if I experience altitude sickness?
If you notice symptoms, descend to a lower altitude immediately and seek help if necessary. Staying hydrated and resting can help alleviate symptoms, but prioritizing safety is paramount.
4. Can I find accommodations along the trek?
Accommodations are limited. Camping is your best bet, with basic guesthouses available in Gangotri. Embracing the camping experience allows for a deeper connection with nature and adds to the adventure.
5. How can I stay connected while trekking?
Carry a mobile phone with a local SIM and a power bank. For remote areas, consider using a satellite phone for emergencies. Staying connected can provide peace of mind, especially when trekking solo.
