
Top 10 Must-Have Things to Pack for the Sar Pass Trek
Are you gearing up for the Sar Pass trek? Let me tell you, this adventure is nothing short of a magical journey through the Himalayas. The climb over Sar Pass has it everything, from snow-covered pathways to lush meadows. But—and it’s a big but—you’ve got to be well-prepared. Having the right gear with you may make or break your vacation. Trust me, you don’t want to find yourself shivering at night or running out of snacks mid-trek. So, let’s talk about what you absolutely need to pack for a smooth and memorable trip to Sar Pass.
Understanding What Makes the Sar Pass Trek Unique
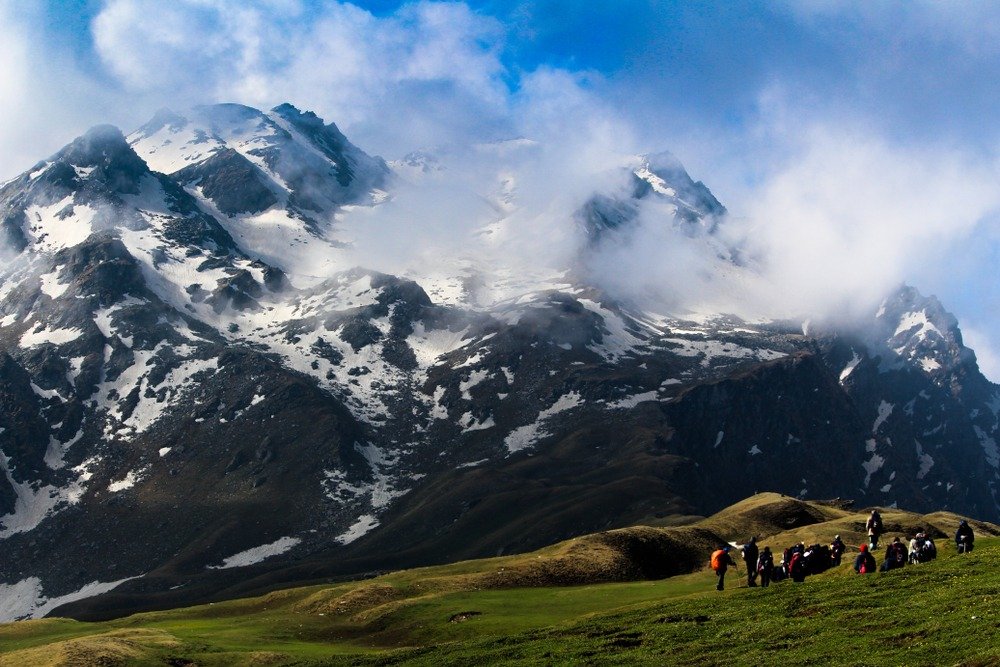
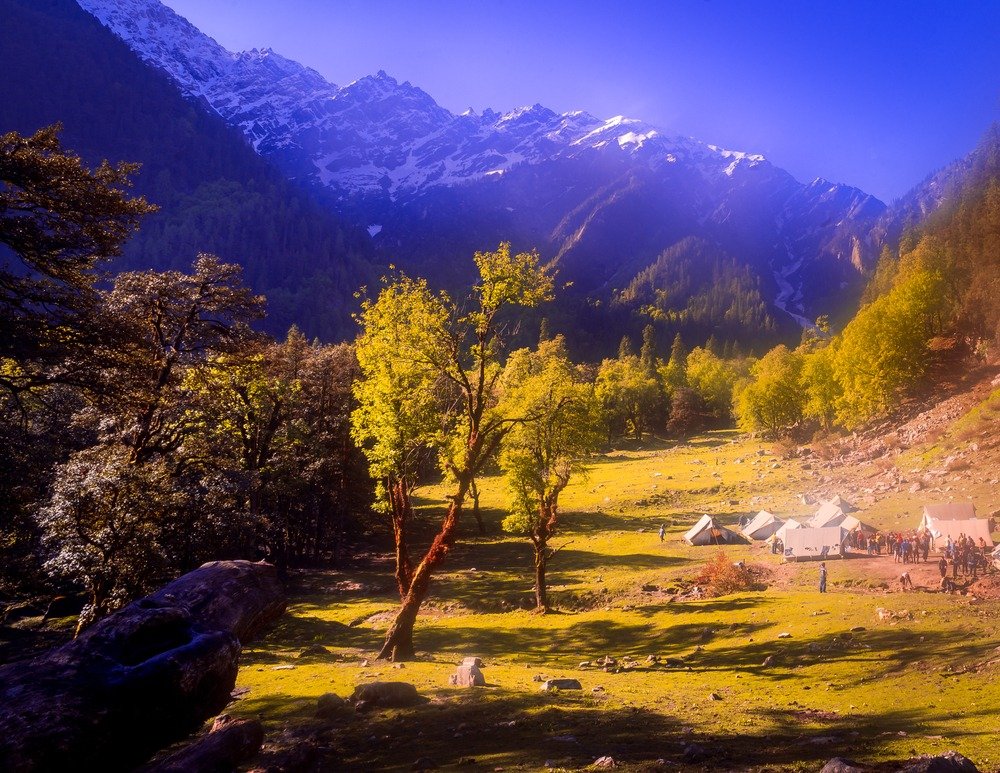
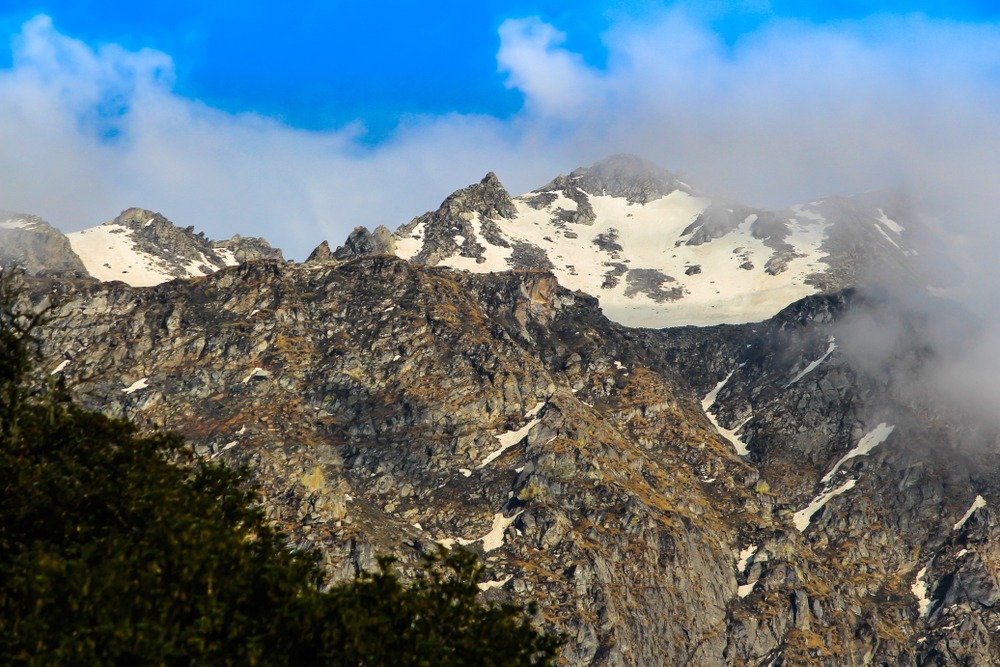
Before we dive into the packing list, let’s get a sense of what you’re signing up for. At 13,800 feet, Sar Pass is tucked away in the Himachal Pradesh Parvati Valley. It’s about a 4-5 day trek, and though it’s labeled as “moderate,” the elevation, cold weather, and snow can push your limits, especially if you’re not used to trekking at high altitudes. The trail offers breathtaking views, from verdant forests to rugged mountain terrain, making it a photographer’s paradise. Each step you take reveals a new vista that’s simply unforgettable.
The weather here is as unpredictable as a surprise party, going from sunny to chilly in a snap. So, packing wisely is key. On my first trek, I remember being caught in a sudden snowstorm, and I was grateful for the layers I had packed. The key is to be adaptable; you’ll often find yourself switching between sunny and snowy conditions throughout the day.
1. Sturdy Trekking Shoes: Your Best Friend on the Trail
Let me tell you this upfront: good trekking shoes are your biggest investment for this trek. The trails are a mix of snow, rocks, and steep slopes, so you need shoes that can take on anything. I made the mistake of wearing regular sneakers once on a trek, and I ended up with sore feet and more blisters than I could count! The right shoes not only provide comfort but also prevent injuries that can sideline your adventure.
When choosing your trekking shoes, pay attention to the fit. A snug fit that isn’t too tight is what you want. A good pair should have ample toe room and a firm heel to minimize slippage. Seek footwear with a Vibram sole for superior traction on slick areas. The last thing you want is to lose your footing on a steep incline. Remember to break them in before you depart. You don’t want your feet to go on strike halfway up the mountain!
2. Layered Clothing: Stay Warm Without Bulking Up
When it comes to trekking in the Himalayas, layering is the name of the game. I can’t stress enough how important it is to have three layers that work together seamlessly. Each layer serves a unique purpose and allows you to regulate your body temperature effectively. The weather can change rapidly, so being able to adapt your clothing is crucial for your comfort and safety on the trail.
The base layer is your first line of defense against moisture. Select materials that wick perspiration away from your skin, such as synthetic textiles or merino wool. This layer should fit snugly but comfortably, keeping you dry without feeling restrictive. The mid layer, usually a fleece or insulated jacket, traps heat, keeping you warm even in chilly conditions. Finally, the outer layer is your shield against wind and precipitation. A good waterproof jacket will protect your layers from getting soaked, which is vital for maintaining warmth.
Why layers? Well, as you hike, your body heats up and the weather changes, so you can peel off or add on layers as needed. Bulky jackets are great for when you’re sitting still, but they’ll weigh you down while trekking. Also, having extra layers allows you to prepare for unexpected cold snaps, ensuring that you’re never caught off guard by the elements.
3. A Backpack With Rain Cover: Keep Your Gear Dry
A well-designed backpack is essential. Not too big, not too small—40 to 50 liters is just about right. You’ll want one that sits comfortably on your back and has padded shoulder straps to take the weight off your shoulders. The backpack should have multiple compartments to help you organize your gear efficiently. I always keep my snacks and water bottle in easily accessible pockets, so I don’t have to dig through my pack every time I get thirsty or hungry.
And don’t forget the rain cover. On one of my treks, I thought I could skip it because the weather looked clear. Guess what? Midway through the trek, we got hit by a sudden downpour, and my entire bag was soaked. A rain cover would’ve saved the day! Look for a backpack that comes with a rain cover or buy one separately; they are usually lightweight and easy to stow when not in use.
Additionally, consider features like hydration reservoir compartments, as these make drinking on the go a breeze. Your backpack should also have a waist strap to distribute weight evenly, reducing strain on your back. Remember, comfort is key when you’re spending hours on the trail!
4. Sleeping Bag: Stay Warm When the Temperature Drops
You’ll be camping at high altitudes, and trust me, the nights are cold. Even in the summer, it can feel like winter up there. A good sleeping bag will be your savior. Look for one rated for zero-degree temperatures or lower, and make sure it’s lightweight and easy to pack. Down sleeping bags are great because they compress easily, but synthetic ones are often more affordable and provide insulation even when wet.
Don’t forget about the size and shape of the sleeping bag. Mummy-shaped bags are more efficient at retaining heat, while rectangular bags offer more room but may leave you feeling chilly. It’s a trade-off between warmth and comfort, so choose based on your personal preference. Also, consider bringing a sleeping bag liner for extra warmth and hygiene, especially if you’re sharing tents with others.
Whatever you do, don’t skimp on this—you’ll thank yourself when you’re toasty warm while the wind howls outside your tent. On my first trek, I was cozy in my sleeping bag while others shivered through the night. Having the right gear can truly make the experience more enjoyable, allowing you to rest and recharge for the next day’s adventures.
5. First Aid Kit: Better Safe Than Sorry
If there’s one thing you don’t want to overlook, it’s a first aid kit. Sar Pass might be stunning, but it’s also remote, and the last thing you want is to be caught unprepared. My kit always includes:
- Painkillers for those inevitable muscle aches.
- Band-aids and antiseptic for small cuts or blisters.
- Altitude sickness medication. Trust me, altitude can hit you out of nowhere.
Additionally, consider including items like gauze, tweezers, and a thermometer. You may hike with peace of mind knowing that you can take care of minor medical difficulties with a well-stocked kit. You might also want to carry any personal medications and an epinephrine auto-injector if you have severe allergies. It’s always better to over-pack in this department.
Moreover, familiarize yourself with basic first aid procedures before your trip. Knowing how to treat a sprained ankle or how to handle altitude sickness can make a world of difference in an emergency situation. When I took a wilderness first aid course before my treks, it really boosted my confidence and prepared me to handle minor incidents.
6. Trekking Poles: Extra Stability on Steep Descents
I used to think trekking poles were only for serious hikers, but after a few treks, I realized how wrong I was. These things are life-savers, especially on those steep descents where every step feels a bit risky. They help take the strain off your knees and give you that extra bit of balance when you’re traversing tricky sections. I remember one particularly steep area where my poles helped me navigate the snow and ice, making the descent far less daunting.
When selecting trekking poles, look for collapsible models that can easily fit into your backpack when not in use. Adjustable poles are ideal, as you can change the length depending on the terrain. This feature can make uphill climbs easier and provide stability on the way down. I often extend my poles during climbs for better leverage and shorten them for descents.
Another tip is to practice using the poles before your trek. Proper technique involves planting the poles in rhythm with your steps, which can improve your efficiency and reduce fatigue. Trust me; once you get the hang of it, you won’t want to trek without them!
7. Water Bottle or Hydration Pack: Stay Hydrated, Stay Energized
Dehydration at high altitudes can sneak up on you faster than you think, and by the time you’re thirsty, you’re already behind on hydration. I prefer a hydration bladder—you can sip water without stopping to pull out a bottle every time. But a sturdy water jug accomplishes the same thing. In any case, try to drink two liters or more each day. It’s surprising how much water you can lose while trekking, especially in dry, high-altitude environments.
Bring along a filter or some tablets for water purification if you can. You never know when you’ll need to refill from a stream, and you don’t want to take any risks with untreated water. Staying hydrated not only helps to prevent altitude sickness but also keeps your energy levels up, so don’t underestimate the importance of drinking enough.
Additionally, consider bringing a collapsible water bottle for extra capacity. They’re lightweight and easy to store when not in use. My experience has shown that having multiple water sources—like a hydration bladder and a bottle—allows for flexibility, especially when you reach streams or lakes. Hydration is key to enjoying your trek, so plan accordingly!
8. High-Energy Snacks: Fuel for the Journey
While meals are usually provided by your trekking group, there’s nothing like having your own stash of high-energy snacks for that extra boost. Think:
- Nuts and dried fruits for quick energy.
- Protein bars to keep you going.
- A bit of dark chocolate for a morale boost (trust me, you’ll need it!).
Packing snacks that are high in protein and carbohydrates will help sustain your energy levels throughout the trek. I like to pack a mix of savory and sweet options to keep things interesting. Remember, when you’re hiking, it’s easy to forget to eat, but making it a habit to snack regularly will help you maintain your strength.
Also, consider individual portion sizes. Pre-packaged snacks can save time and prevent overindulgence. I often bring small resealable bags filled with nuts, granola, and energy bars. They’re lightweight, easy to carry, and a lifesaver when hunger strikes unexpectedly. The right snacks can make a significant difference in your mood and energy levels, especially on long trekking days.
9. Headlamp: Don’t Get Caught in the Dark
When you’re trekking or camping, the sun sets before you know it. A headlamp is a must-have, especially for those early morning starts or late-night camp chores. Go for one with adjustable brightness and a long battery life. You want something that’ll last the entire trip—changing batteries in the dark isn’t fun!
A headlamp allows you to keep your hands free while you set up camp or navigate tricky trails after sunset. I always find myself using my headlamp for more than just trekking; it’s helpful for reading, cooking, or even finding something in my backpack. Look for one that’s lightweight and comfortable, as you’ll be wearing it for extended periods.
In addition to your headlamp, consider bringing a small flashlight as a backup. I once had a headlamp malfunction mid-trek, and it was a bit nerve-wracking trying to navigate in the dark with just my phone light. A good headlamp can be a game-changer for your overall trekking experience, ensuring safety and ease during those darker moments.
10. Personal Identification and Permits: Don’t Leave Home Without Them
Yes, you’re headed for the wilds, but paperwork still matters! For the Sar Pass trek, you’ll need your government ID and sometimes trekking permits. Your trekking company usually arranges permits, but it’s always smart to have a backup copy of everything—just in case. Keeping these documents secure yet accessible will save you headaches if you need to present them.
In addition to your ID and permits, it’s wise to carry a list of emergency contacts and your insurance information. This way, you’ll be prepared in case of unexpected situations. On one trek, a fellow hiker got injured and needed assistance, and having insurance information readily available made the process smoother. If you’re ready to tackle the Sar Pass trek, I suggest reaching out to The Searching Souls. They provide great gear and excellent service.
Being well-prepared with identification and permits not only keeps you compliant with local regulations but also adds a layer of security to your journey. Remember, it’s the little details that can make a big difference in your trekking experience.
Bonus Items You’ll Be Glad You Packed
Okay, so we’ve covered the basics, but here are a few extra things that might not seem essential, but are absolute game-changers:
- Sunglasses: To protect your eyes from the snow glare. The sun’s rays reflect off snow and can be blinding. Good-quality polarized sunglasses will protect your vision and enhance your overall trekking experience.
- Sunscreen and lip balm: High-altitude sun can be brutal. Even on cloudy days, UV rays can reach you, so apply sunscreen regularly. I learned the hard way on my first trek when I ended up with a sunburn on my nose, which was incredibly uncomfortable!
- Multi-tool: A pocket knife or tool can come in handy for all sorts of things, from opening food packages to making minor repairs. It’s a small item that can have a big impact on your comfort and safety.
Conclusion: Be Prepared, and You’ll Love Every Moment
The Sar Pass trek is one of the most rewarding treks you can do. But remember, preparation is everything. With the right gear and mindset, you’ll be able to focus on the breathtaking beauty around you instead of worrying about sore feet, cold nights, or missing snacks.
So, take the time to pack wisely—your future trekking self will thank you. And when you’re standing at the top of Sar Pass, breathing in the crisp mountain air, you’ll know it was all worth it. Embrace the adventure, and enjoy every moment on this incredible journey through the Himalayas!
FAQs
1. How hard is the Sar Pass trek?
It’s considered a moderate trek, but the altitude and weather can make it challenging. Good physical fitness is a must, and it’s advisable to train beforehand to prepare your body for the rigors of high-altitude trekking.
2. What’s the best time for the Sar Pass trek?
The ideal time is from May to June or September to October when the weather is more predictable and snow conditions are manageable. These months offer the best chance for clear skies and pleasant trekking temperatures.
3. Do I need a guide for Sar Pass?
While experienced trekkers might go solo, a guide or joining a trekking group is highly recommended, especially if it’s your first time. A knowledgeable guide can enhance your experience by sharing local insights and navigating the trails.
4. What kind of fitness is required?
You should focus on building endurance and leg strength. Regular cardio, like running or cycling, and exercises like squats will help prepare you. It’s also a good idea to practice hiking on varied terrains to simulate the trek.
5. Will I have phone network connectivity?
Network connectivity is sparse and unreliable, especially at higher altitudes. Make sure to inform your family about possible gaps in communication, and consider investing in a portable charger to keep your devices powered up during the trek.